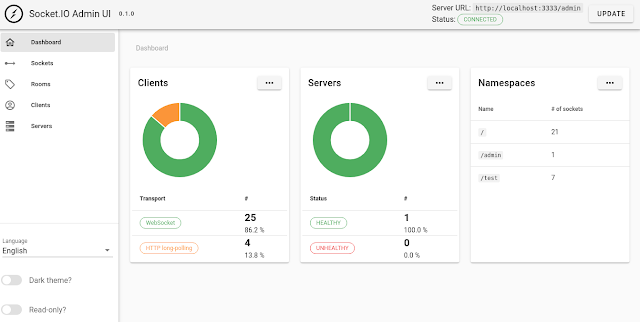
Socket.IO published the Admin UI to monitor the status of the socket connections, In this post, we will look through the SockeIO Admin UI, play around with the different features available on the Admin UI. Let's get started.
Socket.IO Admin UI
Socket.IO Admin UI allows the system admin to analyse the socket connection on the socketIO. In the overview dashboard, you can find the total clients and servers in the system. It lists the namespace with the current client count as well.
It pings the server every 2 - 3 seconds and updates the server status. Some of the features currently supported are:
- Overview of the servers and the clients that are currently connected
- Details of each socket instance (active transport, handshake, rooms, …)
- Details of each room
- Administrative operations (join, leave, disconnect)
- Disconnect a connected client
- Remove a Client from a room
- Remove all clients from a room
- Add a client to a room
Client Details on Socket.IO Admin UI
You can view the details of the Clients, namespace, rooms on the Admin UI. Here is the sample of user details.
As a Client detail, you can view Client Id, Current Status, Transport, Ip address.
It informs the namespace the user is connected to.
We can find the initial HTTP request header as well.
You can get the list of joined group of the client. With the option to remove (leave) the user from the group and the option to add the user in another group as well.
How to connect to Admin UI
To connect your application to Admin UI, Your server should use Socket.IO v4 server or Socket.IO v3 server (>= 3.1.0).
You need to install the npm dependency @socket.io/admin-ui, Then call the instrument methods with the io server and some options.
I have used the tool called SocketIo Test. while writing this post.
By default admin for admin-ui is created on /admin namespace, so you need to connect to the /admin namespace.
Now to connect to Socket Admin UI, click on https://admin.socket.io/. Then you need to provide the server with the namespace.
Admin Authentication
The password above use is hash of 'changeit', replace the password hash with your password hash.
How it works
- creates a namespace and adds an authentication middleware if applicable
- register listeners for the connection and disconnect event for each existing namespaces to track socket instances
- register a timer which will periodically send stats from the server to the UI
- register handlers for the join, leave and _disconnect commands sent from the UI


0 Comments